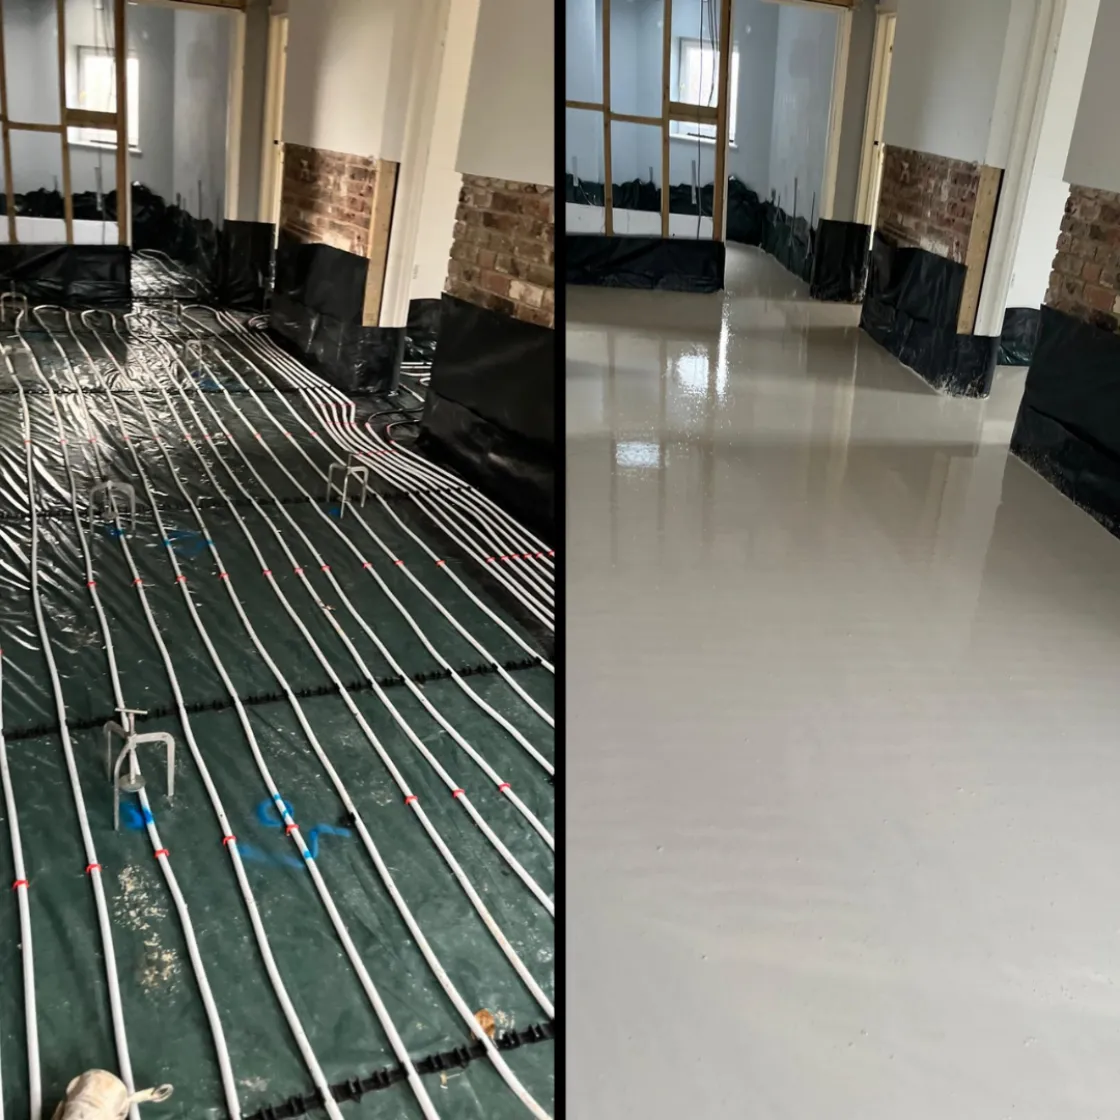
Liquid Screed Installation in Surrey: What to Expect From Quote to Completion
Liquid Screed Installation in Surrey: What to Expect From Quote to Completion
If you're planning a new build, home extension or commercial development in Surrey, choosing the right liquid screed contractor is an important part of achieving a high-quality floor. Understanding the installation process, preparation requirements and drying stages can help you plan your project and avoid unnecessary delays.
At Surrey Flow Screed, we provide professional liquid screed installation throughout Surrey and the South East, helping homeowners, builders and property developers find suitable screeding solutions for their projects.
Step 1: Request a Liquid Screed Quotation
The first step is to discuss your project with a specialist screeding contractor. Providing accurate information helps the contractor assess your requirements and prepare an appropriate quotation.
Useful details include:
The total floor area requiring screed.
The required screed thickness, if known.
Whether underfloor heating is being installed.
The type of building and intended floor covering.
Site access and any specific installation requirements.
Floor plans and site photographs can also help the contractor understand the project before arranging a site assessment where necessary.
Step 2: Prepare the Floor
Proper preparation is essential for a successful installation. Before the screed is poured, the supporting floor construction should be completed in accordance with the specified system.
Depending on the project, preparation may include installing insulation, perimeter edge strips and membranes, as well as sealing joints and service penetrations.
If underfloor heating is being installed, the pipework should be correctly positioned, secured and tested according to the manufacturer's requirements.
The screeding contractor should confirm that the site is ready before the installation date.
Step 3: Pump and Install the Liquid Screed
Once the preparation checks are complete, the liquid screed can be delivered and pumped into the building.
The screed flows across the prepared floor, helping create a smooth and level surface. The installation team will work to the specified thickness and follow the product's installation requirements.
Liquid screed can be particularly useful for larger floor areas, where pumped application can make installation more efficient than traditional manual methods.
Good site access and coordination with other trades help the installation proceed smoothly.
Step 4: Allow the Screed to Harden and Dry
After installation, the screed needs time to harden and dry before subsequent work can proceed.
The time required depends on the product, thickness, temperature, humidity and ventilation. Some products allow light foot traffic within approximately 24–48 hours, but this does not mean the screed is ready for the final floor covering.
Follow the manufacturer's guidance regarding access, ventilation and any underfloor heating commissioning procedure.
Step 5: Prepare for the Final Flooring
Before tiles, vinyl, laminate, wood or another floor covering is installed, the screed must meet the relevant requirements for moisture content and surface preparation.
Some products require sanding to remove laitance, while others have different preparation requirements.
Appropriate moisture testing should confirm that the screed is sufficiently dry for the intended flooring system. Planning this stage in advance helps prevent avoidable delays.
Why Choose an Experienced Liquid Screed Contractor?
Professional installation involves more than simply pouring material onto a floor. Correct preparation, suitable product selection, accurate thickness and coordination with other trades all contribute to a successful result.
Working with an experienced contractor helps ensure that the installation follows the relevant product specifications and that potential issues are identified before the screed is poured.
Frequently Asked Questions
How long does liquid screed installation take?
The installation time depends on the floor area, site preparation, access and project complexity. Liquid screed can often be installed efficiently across large areas, but preparation must be completed beforehand.
How soon can I walk on liquid screed?
Some products permit light foot traffic after approximately 24–48 hours, subject to the manufacturer's instructions and site conditions.
Does Surrey Flow Screed work on extensions and commercial projects?
Surrey Flow Screed provides liquid screed installation for residential and commercial projects. Contact the team to discuss your project requirements and confirm suitability.
Get Your Liquid Screed Quote from Surrey Flow Screed
At Surrey Flow Screed, we provide professional liquid screed installation throughout Surrey and the South East. Whether you're planning a new build, extending your home or managing a commercial development, our team can help you understand your options and prepare for installation.
Contact Surrey Flow Screed today for expert advice and a free, no-obligation quotation.
