How to Prepare a Floor for Liquid Screed (Step-by-Step Guide)
How to Prepare a Floor for Liquid Screed (Step-by-Step Guide)
Introduction
The success of any liquid screed installation starts long before the material is poured.
Proper preparation ensures:
Strong bonding
Smooth finish
Long-term durability
Poor preparation is one of the biggest causes of screed failure.
Step 1: Clean the Subfloor
Remove dust, debris, and contaminants
Ensure surface is stable and free from loose material
👉 Any contamination can affect adhesion.
Step 2: Install Insulation
Improves energy efficiency
Required for underfloor heating systems
Step 3: Install Damp Proof Membrane
Prevents moisture rising from below
Protects screed integrity
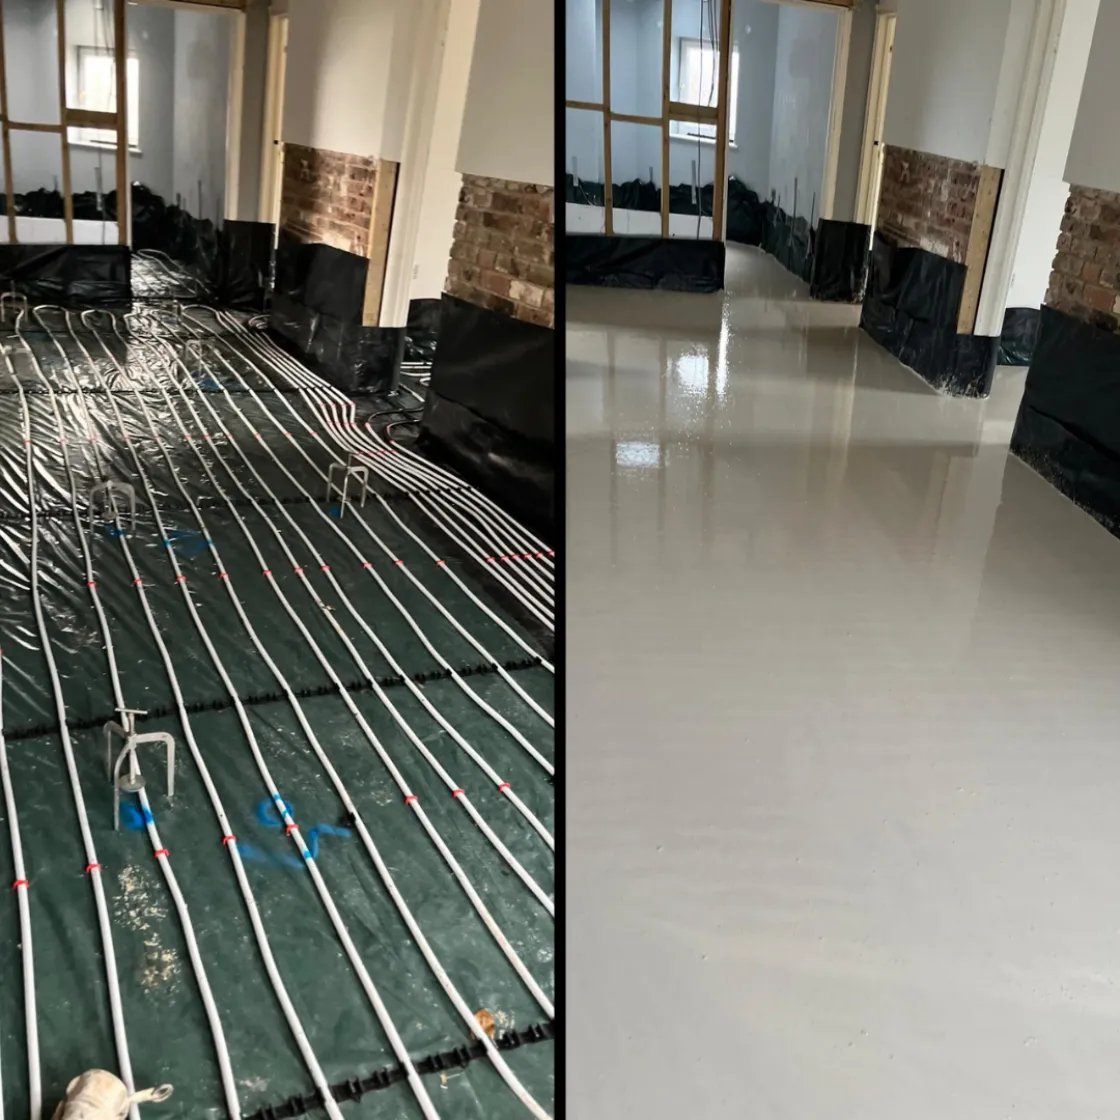
Step 4: Install Underfloor Heating (If Required)
Secure pipes firmly
Ensure correct spacing
Step 5: Edge Insulation
Allows for expansion
Prevents cracking
Step 6: Check Levels
Ensure the surface is level
Use appropriate levelling tools
Step 7: Final Inspection
Before pouring:
Check all layers
Confirm everything is secure
Common Preparation Mistakes
Skipping cleaning
Poor insulation setup
Loose UFH pipes
Uneven base
Why Preparation Matters
Incorrect preparation can lead to:
Cracking
Uneven floors
Reduced lifespan
Conclusion
Preparation isn’t optional—it’s the foundation of a successful screeding project.
👉 Make sure your project starts right—get expert preparation advice.
